

In Dune: Awakening, Flour Sand is a key material for upgrading your base, crafting weapons, and progressing through the game. You won’t find it in rock nodes like typical ores, but it’s crucial for making advanced resources like Silicone Blocks. In other words, if you want to thrive on Arrakis, you’ll have to gather a lot of Flour Sand. Fortunately for you, it’s not hard to collect once you know where to look. This guide shows you how to get Flour Sand in Dune: Awakening—what it’s for, how to gather it, where to find it, and how to avoid the sandworm.
What Is Flour Sand (and Why Do You Need It)?
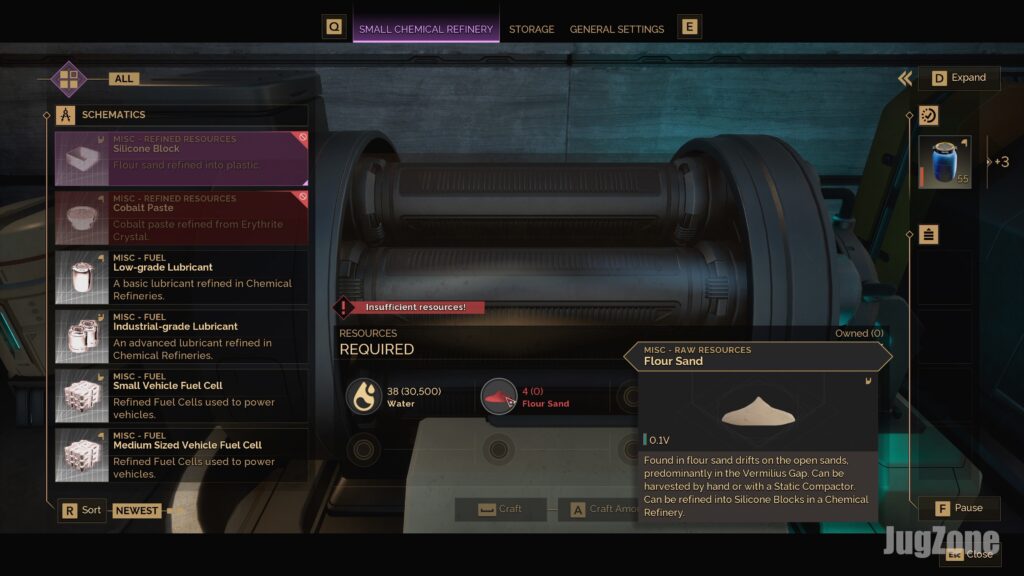
Flour Sand is a resource found in the sands of the desert. It appears in certain areas of the open dunes (primarily the Vermillius Gap region), but unlike other common minerals that you can harvest with your Cutteray, Flour Sand must be collected by compacting the sand itself using a unique tool that we’ll cover below.
Flour Sand is key because it’s used to craft Silicone Blocks—an ingredient you’ll need for just about everything mid- to late-game, from advanced base upgrades to high-end gear. To make one block, you’ll need about five Flour Sand, and 50 Water in a Chemical Refinery. Not bad compared to some other recipes. It’s also pretty lightweight at 0.1 per unit, so you can carry a good amount. Still, since you’ll be farming this stuff by the hundreds, bring a vehicle with storage. A buggy or sandbike makes a big difference when you’re trying to load up in a single run.
Tools and Preparation for Flour Sand Harvesting

Before you rush into the desert, make sure you’re adequately equipped. You can’t gather Flour Sand by hand or with standard mining tools, at least not efficiently. Here’s what you’ll need to prepare:
- Static Compactor: The Static Compactor is the only tool that lets you effectively harvest Flour Sand (and Spice Sand), compacting loose sand into collectable clumps. You’ll need to unlock its blueprint by completing the Second Trial of Aql, or loot one from an enemy camp. To craft it, use a Fabricator with 10 Iron Ingots (smelted from Iron Ore and Water) and 7 EMF Generators, which can be found in sealed Fremen caves or looted from camps. Once it’s built, make sure it’s in your inventory before heading out—you don’t want to realize you left it at base mid-run.
- Power Packs (Batteries): The Static Compactor is a powered tool, meaning it consumes energy from your Power Pack (battery) while in use. Bring two or three spare Power Packs with you, as compacting sand can drain your battery quickly. If you find that battery life is an issue, consider investing in the Overcharge skill in the Planetologist class tree, which increases your power pack’s capacity. Overcharge (a Scientist-tree passive for Planetologists) essentially lets you push your power pack beyond its normal limits, so you can run tools like the compactor longer before needing a swap or recharge. Having a higher max power or extra batteries on hand will ensure you don’t run out of juice in the middle of a harvesting session.
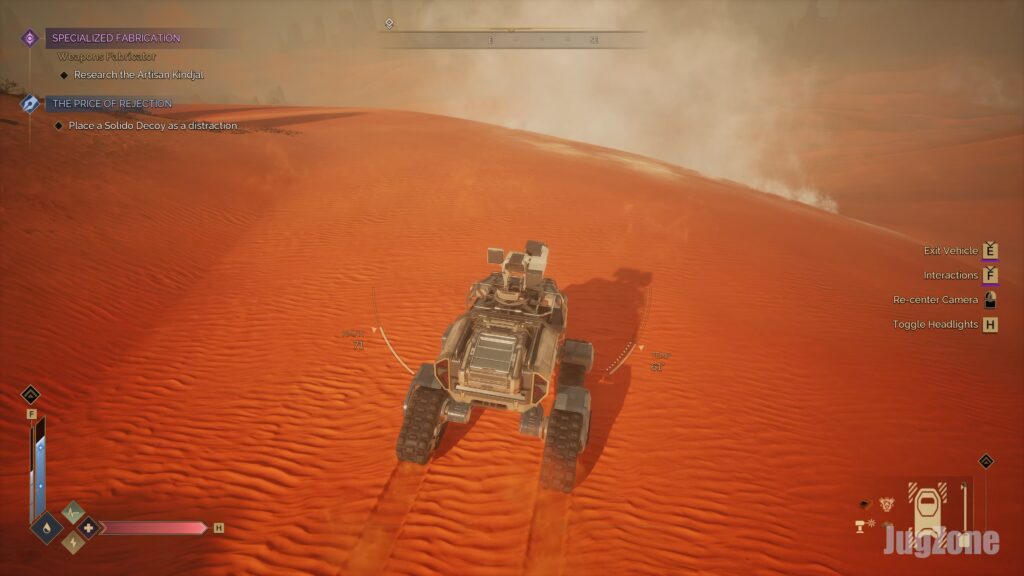
- Vehicle with Storage: As mentioned earlier, a vehicle is highly recommended for Flour Sand farming. A Sandbike or buggy with a storage attachment will let you cover ground faster and get to safe land quickly. More importantly, it provides storage, allowing you to carry back large quantities of sand in one trip. Even though Flour Sand isn’t heavy individually, you will often end up with stacks of 100+ units, and a vehicle helps carry all that resource home. If you happen to have an Ornithopter, you can use it to reach farming spots quickly as well.
Finding Flour Sand Fields (Locations & Sandworm Safety)
Flour Sand fields can be recognized by thin white dust clouds rising from the ground in the open desert. These hazy patches of pale sand indicate a Flour Sand deposit hiding just below the surface.
Where do you find Flour Sand? Early on, you won’t see any near your starting base in Hagga Basin. You’ll need to venture out beyond the safer early-game zones and into the desert – notably the Vermillius Gap region, which lies to the south/southeast of the starting area. Vermillius Gap is known to be more dangerous (it’s often the first area where you’re truly exposed to sandworm attacks), but it also contains the Flour Sand you’re looking for.
To locate Flour Sand visually, watch for telltale signs in the sand as you explore:
- White, hazy sand patches: Flour Sand appears as patches of slightly lighter-colored sand. The texture appears powdery or dusty, unlike normal dunes.
- Thin white smoke or dust plumes: Often you will see faint white mist or smoke puffing up from the ground. These white dust clouds are a clear indicator of a Flour Sand field.
When searching for Flour Sand, stay near rocky edges or mountain bases. Sandworms patrol the open dunes and are triggered by movement and tool use, but they avoid solid rock. Sticking to these borders reduces your risk of attack, and many Flour Sand spawns appear near rock formations. A Sandbike or vehicle helps you cover ground quickly and escape if a worm shows up.
Tip: Pay close attention to the worm sign – the sound and visual cues of an incoming sandworm (the rumble in the ground or a warning indicator on your HUD). If you notice the worm’s presence, stop what you’re doing and get to solid ground immediately. The worm’s attack can come very fast once it homes in on you, so always have an escape route in mind (such as a rocky outcrop or your parked vehicle on firm ground).
How to Harvest Flour Sand (Safely, Without Becoming Worm Food)

So you’ve found a Flour Sand field – you see the white mist puffing from the dunes – now, how do you actually gather the Flour Sand? This is where your Static Compactor comes into play.
Technically, the game does allow you to collect small amounts of Flour Sand by hand (i.e., manually scooping), but this is extremely slow and risky. You might only get a few units at a time, and each scoop takes time, all while the sandworm is listening. The longer you linger and dig around, the more you invite a sandy death. Using the Static Compactor is by far the preferred method, as it drastically cuts down the gathering time. The compactor effectively lets you vacuum up a patch of Flour Sand in a few seconds, whereas doing it manually could take many seconds per handful – a huge difference when a giant worm could attack at any moment.
Here’s the basic process to harvest Flour Sand with the compactor:
- Equip the Static Compactor (make sure it’s in your toolbar and has a charged Power Pack).
- Aim at the Flour Sand patch (right where the white smoke is coming out of the ground).
- Fire the Static Compactor at the ground. It will emit an energy blast that compresses the loose sand into a collectible clump. You’ll see a small pile or cube of Flour Sand materialize on the spot.
- Quickly run over and collect the compacted sand clump (interact with it to loot). Each successful compaction yields a chunk of Flour Sand in your inventory.
Using the compactor greatly speeds up the process of extracting the sand, but keep in mind that it makes a lot of noise – the device’s blasts will attract sandworms. There are a couple of different strategies you can use when collecting Flour Sand, depending on how cautious you want to be:
- Method 1: “Hit-and-Pick” (Conservative Approach): Fire a single shot of the Static Compactor to bring up one Flour Sand clump, grab it immediately, then move on or pause to check for worm activity. By only doing one at a time, you minimize continuous noise and can quickly retreat to safety after each pickup. This method is slower in terms of yield per trip, but it’s safer because you’re not staying in one spot for long and you’re limiting the amount of noise you make in one go. If you’re highly risk-averse or just getting used to worm behavior, this one-by-one approach is a good way to start.
- Method 2: “Burst Farming” (Efficient but Riskier): If you’re in a safe spot, you can quickly fire multiple compactor shots across the field, then sweep through to collect the clumps. This burst method increases your yield but also creates more noise, raising the risk of drawing a sandworm. Only use this strategy if you have a clear exit plan and stay alert for worm signs. Some players limit themselves to a set number of shots before collecting to stay safe—adjust based on your comfort level.
Regardless of the method you choose, always remain vigilant. If a worm does start to home in on you, drop everything and retreat to a safe zone (rocky area or use your vehicle to speed off). It’s better to lose a bit of uncollected sand than to lose your life (and all your gear) to a sandworm. The goal is to get in, grab the goods, and get out as efficiently as possible.
Other Ways to Get Flour Sand

While actively farming Flour Sand with a Static Compactor is the primary method (and the focus of this guide), keep in mind you can occasionally acquire Flour Sand through other means too:
- Looting Enemies and Chests: Enemies around Vermillius Gap, especially those in camps or points of interest (like Imperial Testing Stations), can drop Flour Sand when defeated. Likewise, chests and loot containers in those areas sometimes contain a few units of Flour Sand. Don’t expect huge quantities, but it’s a nice bonus if you’re already out adventuring or raiding.
- Trading and the Exchange: If you have plenty of currency (Solari) or trade goods, you can obtain Flour Sand without touching a grain of sand yourself by trading with other players. Visit the Exchange (the player market/auction house) in social hubs such as Arrakeen or Harko Village and see if anyone is selling Flour Sand. Prices will vary by server and supply, of course. This method might be useful if you only need a little more to reach a crafting requirement and don’t want to make a separate trip to the desert.
Best Flour Sand Farming Spots and Safety Tips
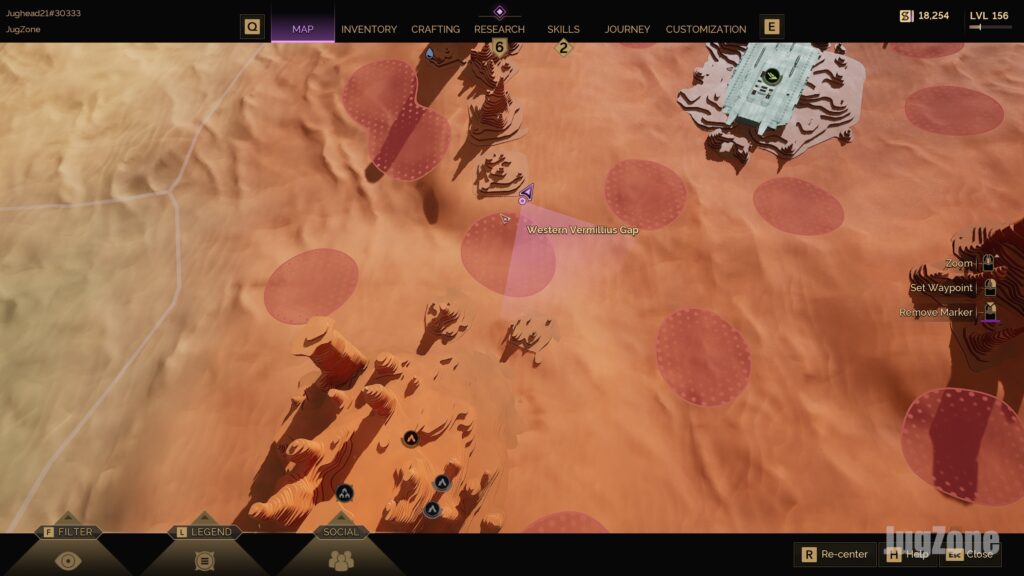
By now, you know that Vermillius Gap is the go-to region for Flour Sand. Within that region (and other deep desert areas), not all spots are equally dangerous. Some Flour Sand fields spawn in the middle of vast open dunes (very risky), while others spawn closer to solid ground or canyon edges (much safer). The trick is to find the sweet spots where you can gather without constantly looking over your shoulder for a worm. Here are some tips and examples:
- Farm Along the Edges: I’ve emphasized this, but it bears repeating – the best and safest way to farm Flour Sand is to stick to areas where sand meets rock. Often, Flour Sand deposits will appear just at the border of a rocky outcrop or mountain range. In these locations, you can literally have one foot on rock and one on sand while harvesting. The sandworm’s territory (the “worm zone”) usually does not extend right up to the rock; in fact, players have noted that when they are close enough to a rock wall or cliff, the worm warning indicator might not even appear. This means you can farm in peace, as long as you don’t wander too far out. Use this to your advantage: position yourself so that you can immediately hop onto the rock if needed, and try to keep your vehicle parked on solid ground behind you.
- Beware of Overconfidence: Even in safer spots, don’t get complacent. A sandworm can sometimes roam closer than expected, especially if you or someone else nearby makes noise out on the sand. Always keep your ears open and have a plan to retreat. If you’re using an ornithopter or vehicle, avoid idling too low or too far out in the sand for too long. One moment of distraction is all it takes for Shai-Hulud (the great worm) to make you its lunch. Harvest smart, harvest fast, and you’ll minimize the danger.
Flour Sand farming in Dune: Awakening might sound intimidating at first – given that you’re harvesting in a monster’s backyard – but with the right preparation and tactics, it can be a relatively routine (and even fun) part of your progression. By unlocking the Static Compactor and gathering Flour Sand efficiently, you’ll unlock those precious Silicone Blocks and be crafting advanced gear in no time. Remember to bring your compactor, pack your batteries, use your head when picking locations, and never underestimate the sandworm.
See the Full walkthrough here: