
If you’re new to NBA 2K25, one of the first things that might trip you up isn’t the gameplay, the dribble moves, or even the shot timing. It’s the camera. Seriously. The default angle in NBA 2K25 can feel like you’re playing through a security cam. It can be awkward, disorienting, and can make it way harder to hoop properly, especially if you’re new to MyCareer.
In this guide, we’ll break down exactly how to change the camera view in NBA 2K25, whether you’re playing offline modes like MyCareer or Play Now, or jumping into competitive online matches. The right camera angle isn’t just a preference; it can actually improve your court awareness, help you find open shots, and make it easier to anticipate what your opponents are doing.
Let’s get you set up with a view that helps you play better, not just watch from a weird angle.
Why the Camera Angle Matters in NBA 2K25
In a game where spacing, timing, and positioning are everything, the way you see the court is critical. Whether you’re a guard trying to read the defense or a big man looking to protect the rim, the right camera view gives you a clearer layout of what’s happening and where to move next.
That’s why you’ll see seasoned players tweaking their camera settings to get a more zoomed-out view or a higher angle—it helps them predict passing lanes, find cutters, and space the floor properly. So if you’re still stuck with the default view, you’re already playing at a disadvantage.
Now let’s fix that.
How to Change the Camera View in MyCareer and Play Now
If you’re playing single-player modes like MyCareer or Play Now, changing the camera is pretty straightforward. Here’s what you need to do:
- Start a game—whether it’s a regular season MyCareer match or a quick game in Play Now.
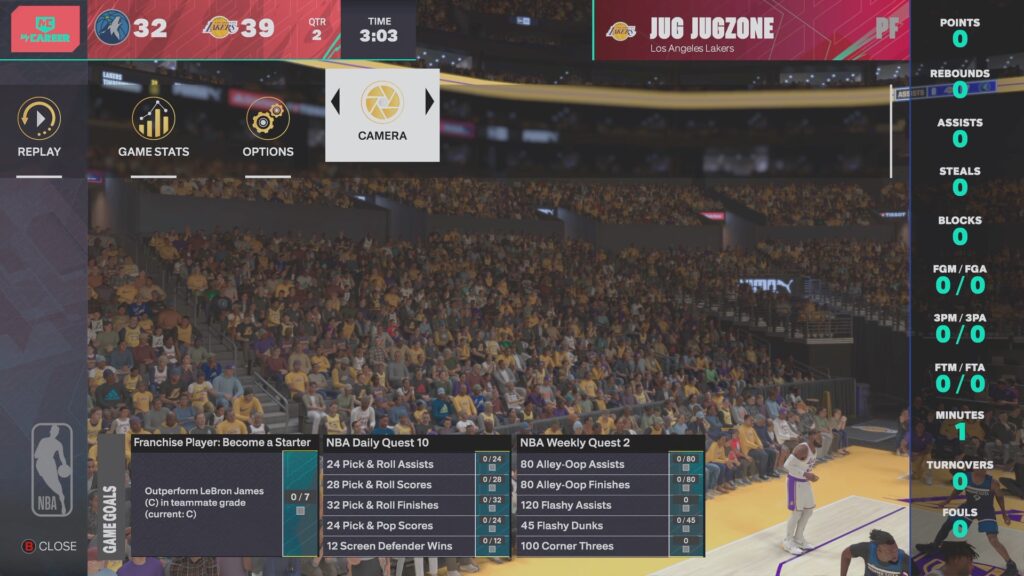
- Once you’re on the court, pause the game.
- Scroll to the right on the pause menu until you see the option labeled “Camera.”
- Select that, and you’ll be presented with several default camera types.
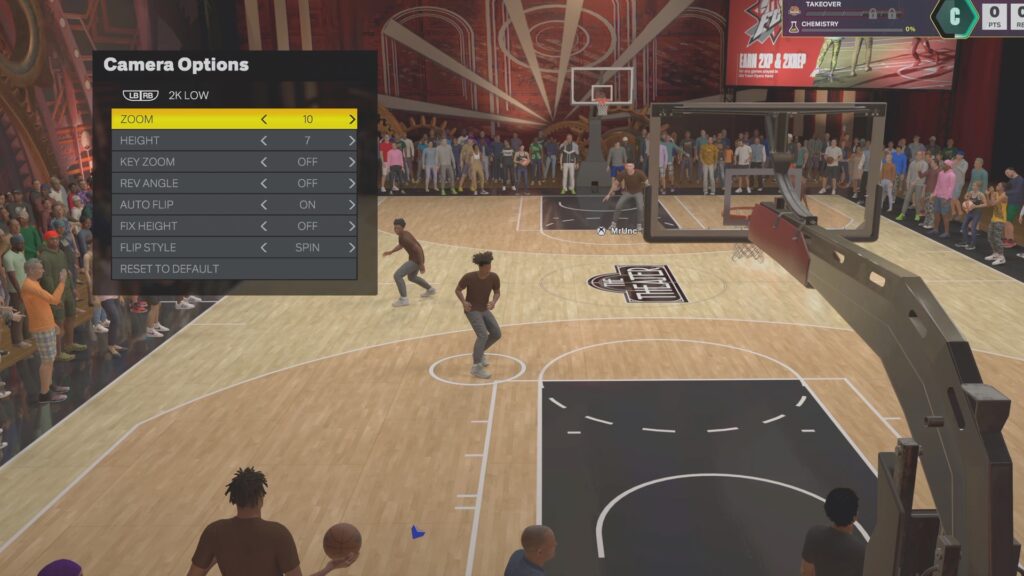
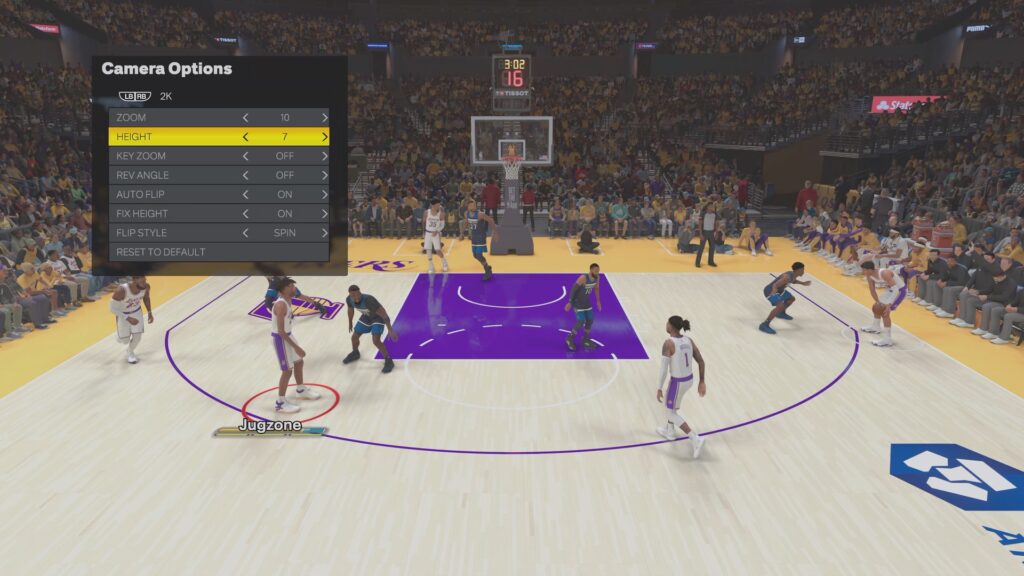
These include views like 2K, Broadcast, High, Rail, and more. Scroll through them and pick one that feels natural to you. Once you choose a base camera, you can fine-tune it with additional settings like:
- Zoom
- Height
- Key Zoom
Experiment with these until you get the angle that fits your playstyle. For example, a lot of players swear by the 2K view with a Zoom setting around 5–10 and a Height of about 10. That setup keeps the camera behind your player but elevated enough to give you a full view of the court.
And if you mess something up? No worries. Just hit “Reset to Default” and start over.
How to Change the Camera View in The City or Online Games
Changing the camera view in online modes like The City is a bit trickier—not because it’s hard, but because you don’t have the luxury of pausing the game.
Here’s how to do it:
- During gameplay, find a moment when you’re not holding the ball and the player you’re guarding isn’t actively involved in a play.
- Tap right on the D-pad (Xbox or PlayStation) to bring up the quick camera options.
- Cycle through and select the view you want.
You’ll want to time this carefully. Fiddling with your camera mid-possession is a great way to get cooked on defense or miss a rotation. Let your teammates know if you’re going to adjust your settings mid-game so they don’t wonder why you’re just standing there, giving up a wide-open dunk.
Yes, it’s a little more complicated than single-player modes, but once you’ve locked in your favorite camera, you won’t need to change it again.
What’s the Best Camera View for NBA 2K25?
This really comes down to preference and your playstyle, but here are a few common picks:
- 2K View: The go-to for most competitive players. Gives a third-person perspective from behind your player. Great for dribbling, spacing, and full-court vision.
- Broadcast: Side view like what you’d see on TV. Not great for gameplay, but some players like the aesthetic.
- High/Zoomed-Out Views: Good if you want more tactical awareness and need to see the entire court at once.
For beginners, starting with the 2K view is usually the best move. It keeps things simple and aligns with how most players learn the game.
Final Tips for New Players
- Don’t overthink it. Find a view that feels natural and stick with it.
- Tweak the zoom and height until you’re comfortable—everyone’s screen size and vision are different.
- Once you’ve found a setup that works, apply it across all your modes for consistency.
- Communicate during online games if you’re adjusting your settings mid-match. Your teammates will appreciate it.
Step-by-Step Recap
- In single-player, pause the game and go to Camera settings.
- Choose your base view (2K is a great default).
- Adjust zoom, height, key zoom, and auto flip as needed.
- In online or City modes, hit right on the D-pad to change camera mid-game.
- Lock in your favorite setup and stick with it across all modes.